Corner Repair

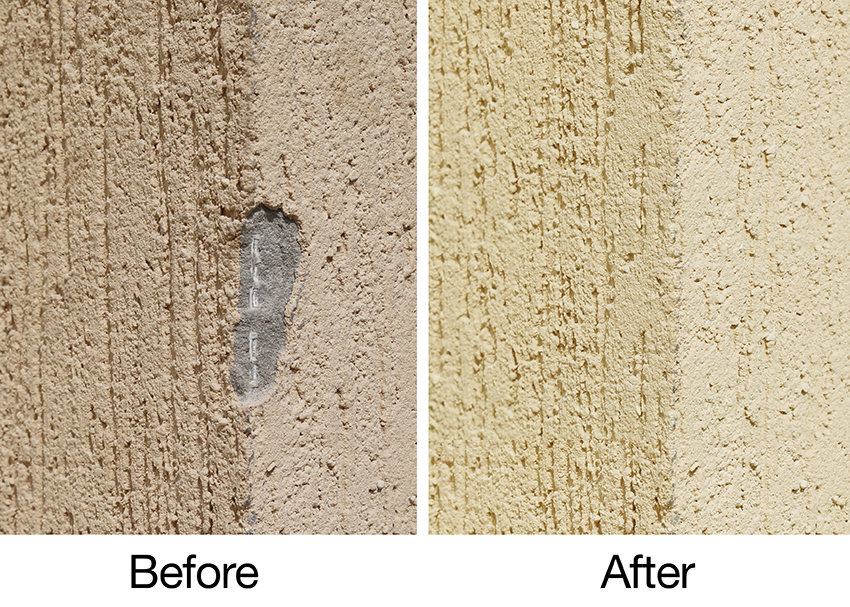
The damage to a corner may be the result of intentional vandalism, or unintentional damage resulting from shopping centre trollies, traffic, etc. The repair of a damaged corner requires the removal and replacement of the damaged area.

Repair Guide

  1. Inspect the damaged area in detail and ascertain the scope and extent of damage. Ensure the necessary tools, equipments, products, safety equipment are readily available. Take care to protect / cover surrounding areas if necessary.
  2. Using broad masking tape, mask off an area slightly larger than the damaged area. Cut out the damaged corner bead or mesh approx. 10cm above and below the damaged area. Using a suitable sharp knife, hand or circular saw with a silicon carbide blade, cut this corner section out down to the substrate.
  3. If there is any damage to the substrate, repair this prior to reinstating the EIFS.
  4. Remove / grind away the EIFS finish coat a minimum of 150 mm on all sides of the cut out area down to the existing base coat layer - keeping the cut edges of the finish coat clean and non-tapered. Please take due care NOT to damage the underlying reinforcing mesh while removing the finish coat.
  5. As appropriate use Terraco Styrofix and Terraco approved mechanical fasteners to install the new insulation board. Take care to use a similar specification insulation board as was originally installed / is present in the remainder of the system to ensure homogenous performance. Ensure the area to be repaired area is filled with insulation board – sliver pieces if necessary - to minimise the possibility of future thermal bridging.
  6. Use Terraco Styrobond DP to fix a new length of corner bead and overlap the side meshing with original mesh and exposed basecoat layer with a minimum of 70mm around the repaired area. Ensure that the newly applied Styrobond is flat. Please note the final level of the applied Styrobond should be approximately 1.5 – 2mm (depending on the finish) below the surrounding / pre-existing finish in order to achieve a flush final result after finish coat application. Allow to dry fully (recommended 24 - 48 hrs subject to ambient conditions).
  7. If necessary, precisely mask off the pre-existing finish. Apply the new Terraco EIFS decorative finish coat (ensure to match the colour with existing finish as applicable) and merge the new finish into the pre-existing finish. While the new decorative finish is still wet, remove the masking tape and feather the edges of the patch so they merge with the surrounding area. As appropriate use a trowel, brush, screw / nail or other applicable tools to match / tweak the texture in detail and ensure the edges of the new and existing finish merge fully. Special care is required at this stage to ensure a successful repair that meets both aesthetic and performance parameters.

      Notes:

  1. Ensure all required tools, products and safety equipment are readily available before starting repairs.
  2. Ensure that the EIFS System to be repaired is completely dry throughout before starting repair work.
  3. As part of the ageing process due to extended exposure, dirt pick up and ambient conditions the original colour may alter slightly over time. Terraco recommends the top coating of the repaired area and the adjacent surfaces / facade(s) with an appropriate shade of Terracoat Stain in order to ensure colour homogeneity.